ZFS encrypted raw send via 10 GBit network

After replacing my 4x 1000 MBit link aggregation with ASUS XG-C100C networking (10 GBit via Cat5e cables :D), I was astonished how slow data transfer took place. There were Several pitfalls which I debugged and here are some important points:

Before you debug your network, make sure, you solve the local problems first!

Linux GPL-only exports and ZFS CDDL module

For license reasons, kernel FPU functions are no longer exported for modules whose licenses differ from GPL. This led to an extreme performance drop in ZFS encryption, etc…
( factor 6 slower on some test equipment ). There are patches available for private usage which violate kernel GPL license, which is okay if not distributed and for research, you know 😉 However, I used an older kernel and I was not hit at all by this license quarrel. So this was not the problem for my bad transfer speed.

You debug this as follows:

look if fpu functions are global symbols:

grep fpu_begin /proc/kallsyms
0000000000000000 T __kernel_fpu_begin
0000000000000000 T kernel_fpu_begin
0000000000000000 r __ksymtab___kernel_fpu_begin
0000000000000000 r __ksymtab_kernel_fpu_begin
0000000000000000 r __kstrtab_kernel_fpu_begin
0000000000000000 r __kstrtab___kernel_fpu_begin

capital T tells global symbol is there

cat /sys/module/zcommon/parameters/zfs_fletcher_4_impl
[fastest] scalar superscalar superscalar4 sse2 ssse3

cat /sys/module/icp/parameters/icp_aes_impl 
cycle [fastest] generic x86_64 aesni

SSH is slow, don’t use it

If you send an encrypted stream, what sense does it make to encrypt it further by SSH? None! And SSH is quite slow – talking bout 90 MB/s on my machine with zfs send -w | ssh target zfs receive … It’s better to use netcat.

netcat is not netcat

There exist two versions of netcat. One is gnu-netcat the other is openbsd-netcat. The latter supports TCP windowing. Without this feature, I got around 88 MB/s, so even less than with SSH or at least not better. With openbsd-netcat however, I got 194 MB/s, which is approx the read speed of my spinning HDD I read from. (Yes, ZFS on a single disk… I know, I know).

A very handy debug method is ‚yes‘.

yes | netcat target port

Or classic with ‚dd‘:

netcat -l -p 4444 | dd of=/dev/null
dd if=/dev/zero | netcat localhost 4444

2772497408 bytes (2,8 GB, 2,6 GiB) copied, 5,52469 s, 502 MB/s

So as you can see, I cannot exceed 4 GBit locally, so I will never reach 10 Gbit by network. I have to buy faster hardware to do so. As long as the limiting factor is from the disks, I am fine with it.


IBM XT-BIOS compilation and testing on temporary systems

Compile the IBM XT-BIOS from source

Dedicated to my friend Peer (as he loves the IBM PC and not the Mac, he just doesn’t know that he does)

Prerequisites

Steps

1. Create a hard disk for your toolchain environment

We will create a virtual harddisk with 3000 cylinders, 6 heads and
19 sectors per track, giving a total of `3000*6*19*512` Bytes.

$ dd if=/dev/zero of=hdd.img bs=512 count=$((3000*6*19))

2. Create a boot disk image file for later use with the IBM PC

MS-DOS 6 will not like it, when you create a partition with parted, because the partition has a too big offset. Just take a bootable disk and start with this floppy to natively format the hard drive with MS-DOS.

3. Now create a floppy that we will later use to boot the emulated IBM PC

$ dd if=/dev/zero of=bootdisk.img bs=512 count=$((40*2*9))

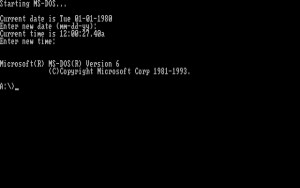
4. Boot the virtual machine with MS-DOS 6 and the `bootdisk.img`.

MS-DOS will start and you can run `fdisk`.

A:\>fdisk

Tell fdisk that you want to use the whole fixed disk and the system should restart.

Boot from floppy again and run

A:\>format C: /s
A:\>md C:\DOS
A:\>copy A:*.* C:\DOS

Assuming that the DOS binaries and files are all in the root directory of A:. If not, adapt the last command accordingly.

5. Stop the simulator and copy the Intel toolchain into the hdd image

First get the offset of the partition on `C:`

$ parted hdd.img
(parted) p

This will display the offset of the partition, which was `9728B` for my case. Then you can mount the partition in linux having this offset.

sudo mount -o offset=9728 hdd.img /mnt

Please only work with 8.3 file names now in capital letters, just because!

mkdir /mnt/INTEL
cp <intel-toolchain-dir>/* /mnt/INTEL

6. Copy the source listing of the BIOS to `C:\BIOS`

mkdir /mnt/BIOS
cp <bios-listing>/XTBIOS.ASM /mnt/BIOS

Now you can either unmount and change the BIOS listing later with `edit` in MS-DOS or in Linux with vim.

7. Patch the source code

The following changes must be made to the source:

In the part ‚DTERMINE CONFIGURATION AND MFG. MODE‘, line 616, there is

MOVE DATA_WORD[OFFSET EQUIP_FLAG],AX

Change it to

MOVE DATA_WORD[OFFSET EQUIP_FLAG],0000000000101101B

This means that there is one floppy drive and that we can boot from it
as well as we have CGA and start with 80×25.

At line 1237, I had a

AND AL, 00000001B ; ‚LOOP POST‘ SWITCH ON
JNZ F15B ; ‚ CONTINUE WITH BRING-UP

Which is nonsense. Since ‚LOOP POST‘ will do a loop in the post and NOT continue bring up, the jump should be executed when the bit is 0 and not non-zero. However, only the comment is wrong, because the switch is not ‚LOOP POST‘ but ‚BOOT FROM FLOPPY‘ or something like this. The function would be okay. However in my case, I patched this, before I touched the config switches read-in, so I had patched this to

OR AL, 00000001B
JNZ F15B ; ‚ CONTINUE WITH BRING-UP

So that it will always continue booting here, no matter what any switches value says.

Furthermore, there is a checksum function, that also checks the non-existant BASIC ROM at `F6000` which must be faked to always return true for the moment (the BASE ROM also has a wrong / non existing checksum).

At line 5246 in the `ROS CHECKSUM SUBROUTINE` we have

OR AL, AL ; SUM = 0?

Change this to

XOR AL, AL

Then every checksum test will be successful.

8. Compile the code

Now we can compile this code. For future changes to the code it is conveniant to have a DOS batch file for not always having to type in all the commands.

\INTEL\ASM86 XTBIOS.ASM
\INTEL\LINK86 XTBIOS.OBJ
\INTEL\LOC86 XTBIOS.OBJ
\INTEL\OH86 XTBIOS
\INTEL\DXC XTBIOS.HEX

This will produce an `XTBIOS.IMG` with a siye of `1FFE` or `8190 bytes`.

9. Deploy the image for the emulator

Copy it out of the image. By the way, it is easier if you copy the file to a floppy in the emulator, i.e. to the bootdisk and then use

$ mcopy -i bootdisk.img ::/XTBIOS.IMG .

The `mcopy` tool is written to work with DOS drive letters in linux and the `::` special drive letter means, that it refers to the image file.

10. Create a test boot disk for the emulated IBM PC

Install the MS-DOS system files and boot sector on the previously created 360K floppy image:

C:\>format /s /f:360 B:

Thats it.

11. Run the PC emulator with the `XTBIOS.IMG` and the 360K boot disk image.

./pce-ibmpc -c my.cfg

cga_init

post

dosboot

arcade

Systemd – How to setup a openvpn connection

Enabled services: systemd-resolved

NOTE: Replace ${systemconfig} by your etc directory. I am not allowed to write this directory path due to
server policy rules I cannot change.

Assuming you have a working openvpn configuration named

${systemconfig}/openvpn/client.conf

then the only step to activate the openvpn connection is to type

systemctl start openvpn@client.service

which automatically looks for the client.conf file. If you use systemd-resolved and have
${systemconfig}/resolv.conf pointing to /run/systemd/resolve/resolv.conf, you can create a simple bash
script to temporarily overwrite the DNS entries appropriate for your VPN tunnel.

For example, you can create an executable file in ${systemconfig}/openvpn/update-systemd-resolved:

cat > ${systemconfig}/resolv.conf <<EOF
search blah.server.com server.com
nameserver xxx.yyy.zzz.vvv
EOF

with according IP addresses and search entries. Then you can use this script as a hook by
adding the following to your ${systemconfig}/openvpn/client.conf:

script-security 2
setenv PATH /usr/bin
up ${systemconfig}/openvpn/update-systemd-resolved

After starting the connection with systemctl, the name resolution should work according
to your vpn settings. After stopping the openvpn@client.service, the resolv.conf should
be automatically generated again.

Samsung CLP-320 Printer with Cups

Required packages: cups, ghostscript, gsfonts, gutenprint

When you plug-in your printer via USB, you should see similar kernel messages via ‚dmesg -H‘:

usb 4-1.1: reset high-speed USB device number 3 using ehci-pci
[ 2576.915714] usblp 4-1.1:1.0: usblp1: USB Bidirectional printer dev 3 if 0 alt 0 proto 2 vid 0x04E8 pid 0x329F

The printer is accessible via /dev/usb/lp1

Next step is to register the printer in the cups server. You can access the server via http://localhost:631.

For administration, you have to log-in with root access. You should activate your root account and set a password with ’sudo passwd root‘. I did not manage to gain access with another user, despite I added local groups to SystemGroups in cupsd.conf.

You need a working pdd file for the printer. I downloaded the Samsung printer driver for linux and got the file from the ‚uld/noarch/share/ppd‚ directory. You can use this file inside the administration panel of cups web interface when you register the printer.

PulseAudio and Alsa

Alsa is the standard sound system with hardware support and PulseAudio is an additional system which can use Alsa devices.

PulseAudio is necessary for flash videos in firefox to play with sound and also my skype installation needed PulseAudio.

For volume control one can easily use amixer from Alsa. Most problems arose from wrong default devices selected by PulseAudio.
You can change those with the pacmd command and use the corresponding index.

The commands for pacmd are

list-sinks, list-sources, set-default-sink, set-default-source

where you can give the index of the propper Alsa device.

If timidity server is running in background it blocks Alsa on my system. I have to manually stop the timidity-daemon before I can access Alsa devices from other software.

Setting up WLAN

Required: Kernel supports network adapters
Required packages: iw wpa_supplicant dialog

You can check, if your kernel has a module loaded for a specific hardware by using the lsmod and the lspci commands. You can issue lspci -k to see a list of pci devices together with the loaded kernel module.

If your networking device is supported by the kernel, you can issue the command

wifi-menu -o

to connect to an existing wlan. The -o option creates a corresopnding connection profile in the /etc /netctl folder.

To startup the wifi connection automatically on boot, run

netctl enable PROFILENAME

and to disable

netctl disable PROFILENAME

These commands create/remove symbolic links for the systemd daemon. You can list all available profiles with

netctl -l