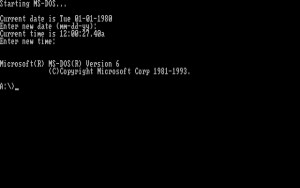
Compile the IBM XT-BIOS from source
Dedicated to my friend Peer (as he loves the IBM PC and not the Mac, he just doesn’t know that he does)
Prerequisites
- Original IBM XT-BIOS Source listing `XTBIOS.ASM`
- Original Intel Toolchain for 80(1)86/80(1)88 CPUs
- Bochs or equivalent emulator for the toolchain
- Support for 360K floppies is helpful
- PCE – PC Emulator for IBM 5150 http://www.hampa.ch/pub/pce/pre/pce-20170208-df19414/pce-20170208-df19414.tgz
- MS-DOS 6 (earlier version will also work)
Steps
1. Create a hard disk for your toolchain environment
We will create a virtual harddisk with 3000 cylinders, 6 heads and
19 sectors per track, giving a total of `3000*6*19*512` Bytes.
$ dd if=/dev/zero of=hdd.img bs=512 count=$((3000*6*19))
2. Create a boot disk image file for later use with the IBM PC
MS-DOS 6 will not like it, when you create a partition with parted, because the partition has a too big offset. Just take a bootable disk and start with this floppy to natively format the hard drive with MS-DOS.
3. Now create a floppy that we will later use to boot the emulated IBM PC
$ dd if=/dev/zero of=bootdisk.img bs=512 count=$((40*2*9))
4. Boot the virtual machine with MS-DOS 6 and the `bootdisk.img`.
MS-DOS will start and you can run `fdisk`.
A:\>fdisk
Tell fdisk that you want to use the whole fixed disk and the system should restart.
Boot from floppy again and run
A:\>format C: /s
A:\>md C:\DOS
A:\>copy A:*.* C:\DOS
Assuming that the DOS binaries and files are all in the root directory of A:. If not, adapt the last command accordingly.
5. Stop the simulator and copy the Intel toolchain into the hdd image
First get the offset of the partition on `C:`
$ parted hdd.img
(parted) p
This will display the offset of the partition, which was `9728B` for my case. Then you can mount the partition in linux having this offset.
sudo mount -o offset=9728 hdd.img /mnt
Please only work with 8.3 file names now in capital letters, just because!
mkdir /mnt/INTEL
cp <intel-toolchain-dir>/* /mnt/INTEL
6. Copy the source listing of the BIOS to `C:\BIOS`
mkdir /mnt/BIOS
cp <bios-listing>/XTBIOS.ASM /mnt/BIOS
Now you can either unmount and change the BIOS listing later with `edit` in MS-DOS or in Linux with vim.
7. Patch the source code
The following changes must be made to the source:
In the part ‚DTERMINE CONFIGURATION AND MFG. MODE‘, line 616, there is
MOVE DATA_WORD[OFFSET EQUIP_FLAG],AX
Change it to
MOVE DATA_WORD[OFFSET EQUIP_FLAG],0000000000101101B
This means that there is one floppy drive and that we can boot from it
as well as we have CGA and start with 80×25.
At line 1237, I had a
AND AL, 00000001B ; ‚LOOP POST‘ SWITCH ON
JNZ F15B ; ‚ CONTINUE WITH BRING-UP
Which is nonsense. Since ‚LOOP POST‘ will do a loop in the post and NOT continue bring up, the jump should be executed when the bit is 0 and not non-zero. However, only the comment is wrong, because the switch is not ‚LOOP POST‘ but ‚BOOT FROM FLOPPY‘ or something like this. The function would be okay. However in my case, I patched this, before I touched the config switches read-in, so I had patched this to
OR AL, 00000001B
JNZ F15B ; ‚ CONTINUE WITH BRING-UP
So that it will always continue booting here, no matter what any switches value says.
Furthermore, there is a checksum function, that also checks the non-existant BASIC ROM at `F6000` which must be faked to always return true for the moment (the BASE ROM also has a wrong / non existing checksum).
At line 5246 in the `ROS CHECKSUM SUBROUTINE` we have
OR AL, AL ; SUM = 0?
Change this to
XOR AL, AL
Then every checksum test will be successful.
8. Compile the code
Now we can compile this code. For future changes to the code it is conveniant to have a DOS batch file for not always having to type in all the commands.
\INTEL\ASM86 XTBIOS.ASM
\INTEL\LINK86 XTBIOS.OBJ
\INTEL\LOC86 XTBIOS.OBJ
\INTEL\OH86 XTBIOS
\INTEL\DXC XTBIOS.HEX
This will produce an `XTBIOS.IMG` with a siye of `1FFE` or `8190 bytes`.
9. Deploy the image for the emulator
Copy it out of the image. By the way, it is easier if you copy the file to a floppy in the emulator, i.e. to the bootdisk and then use
$ mcopy -i bootdisk.img ::/XTBIOS.IMG .
The `mcopy` tool is written to work with DOS drive letters in linux and the `::` special drive letter means, that it refers to the image file.
10. Create a test boot disk for the emulated IBM PC
Install the MS-DOS system files and boot sector on the previously created 360K floppy image:
C:\>format /s /f:360 B:
Thats it.
11. Run the PC emulator with the `XTBIOS.IMG` and the 360K boot disk image.
./pce-ibmpc -c my.cfg


